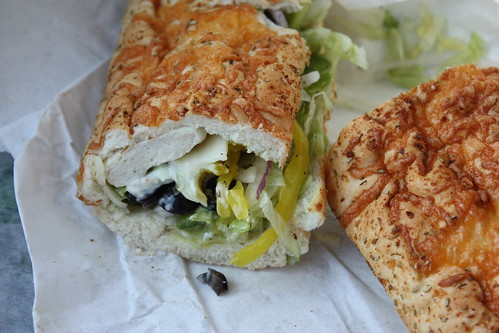
Showing posts with label Assignments. Show all posts

Friday, November 11, 2011

Day in the Life ~ 11-11-11

I may be done with my 365 project for the year, but I'm not done taking photos. I am easing myself back into regularly taking photos again so that come January when I start 365, I'm not out of practice. My first project to this end is this post, Day in the Life ~ 11-11-11. I spent most of it at work, so its pretty standard. My personal favorite, though, is the third photo down.

Breakfast


Lunch


Stop - Hammer Time


Walk Like an Egyptian


Exit

Finally done with work! Was the last one out of the building for the first time since I started my new job.

Thursday, April 8, 2010

Photography Assignment #7 ~ The Rule of Thirds

This week's theme for my 365 project is the Rule of Thirds, so I thought this week would be perfect for a new photography assignment.

The Rule of Thirds is a compositional rule of thumb in visual arts of painting, photography and design. The Rule of Thirds works like this: Imaginary lines are drawn dividing the image into thirds both horizontally and vertically. You place important elements of your composition where these lines intersect. Some proponents of the technique claim that aligning a subject with these points creates more tension, energy and interest than simply placing the subject at the center.

An example from Wikipedia and the Wikimedia Commons:
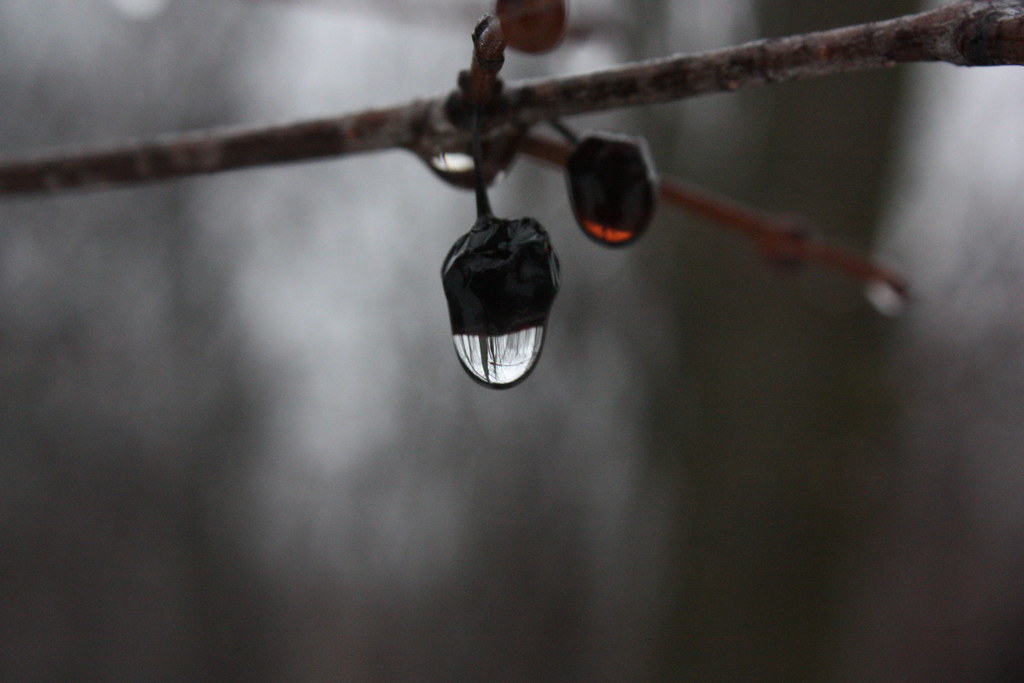
The photograph to the right demonstrates the application of the rule of thirds. The horizon sits at the horizontal line dividing the lower third of the photo from the upper two-thirds. The tree sits at the intersection of two lines, sometimes called a power point. Points of interest in the photo don't have to actually touch one of these lines to take advantage of the rule of thirds. For example, the brightest part of the sky near the horizon where the sun recently set does not fall directly on one of the lines, but does fall near the intersection of two of the lines, close enough to take advantage of the rule.
With that in mind, here are two photos that I took this week using the Rule of Thirds. It was pretty easy to line up the shots because the points in my viewfinder are already set up to help me divide my image into thirds. Hopefully people who might be trying this photo assignment have as easy a time! Otherwise, cropping works if you want to try and line photos up exactly the way you want.

White Flowers ~ 94/365

Pineapple ~ 97/365

Friday, March 12, 2010

Photography Assignment #6 ~ The World in a Water Drop

I've already talked about Macro photography in a previous assignment. The World in a Water Drop is a slightly more advanced version of that concept. In this assignment, the goal is to take a picture of water drops so close and with such focus, that you can see the surrounding world reflected in it. This foggy morning when I took a photo hike, I managed to find big waterdrops with which to attempt this task. I took dozens of photos and only 7 of these World in a Waterdrop pictures turned out. Here are the 3 best of those.

Note: These are very small compared to the original photo size. To truly see what these photos contain, click through the links for the larger versions.

Forest in a Dew Drop

Miniature Blue World

Water Berry

See the rest of the World in a Water Drop photos.

Thursday, February 18, 2010

Photography Assignment #5 ~ Still Life

A still life is a work of art depicting mostly inanimate subjects. Common subjects are everyday items which may be natural or man made, like food, flowers, plants, drinking glasses, books, jewelry, coins, etc., and are arranged in an artificial setting. Still life works give the artist creative license to arrange design elements within composition purposefully, unlike landscapes or portraits.

As with all photographic techniques and styles, attention to lighting is absolutely critical. When photographing still life, there is the potential for a boring image. Shadows and highlights add drama and emphasis.

Bread & Fruit


Still life art usually isn't just a bunch of inanimate objects thrown together. Still life art often contains symbolism relating to the objects depicted, often religious or allegorical. This was part of the challenge of this assignment.

Bread, in its many forms, is among the most popular foods in the world. In various cultures it is a symbol of fertility, birth, life, death, and more. It can be a peace offering and when we "Break bread," we usually are meeting someone new often over a nibble or two.

Apples appear in many folk stories and religious traditions, often as a mystical, enchanted, or forbidden fruit.

Oranges are symbols of love and marriage. Brides traditionally wear orange blossoms in their hair or carry them in their bouquet at their wedding.

Bananas, not surprisingly, are symbols of fertility, potency, and prosperity.

As a tool, a knife can be a symbol of utility. Depicted here it was used to cut the bread, and therefore was useful. Knives can also be defensive or offensive weapons. In defense, it can save lives and in the wrong hands it can take them. In this case, the blade of this knife is pointed at the food, away from the viewer as a sign of peace. Additionally, the bread is on the lighter side of the image while the knife is in the shadows on the darker side. The knife is also separated from the food, but still close-by.

A note: Because of the low light and the brightness of the bread, it took a bit of playing with the white balance to get this picture right but it was totally worth it. Many of the photos turned out too yellow, this one was perfect.

Wednesday, January 13, 2010

Photography Assignment #4 ~ Macro Photography

Macro photography is close-up photography. I'm not 100% sure why it’s called macro photography, believe me I looked. You'd think it would be something more like micro-photography.

According to Wikipedia, the classical definition is that the image projected on the "film plane" (i.e., film or a digital sensor) is close to the same size as the subject. On 35 mm film (for example), the lens is typically optimized to focus sharply on a small area about the size of the film frame. Basically, it means that when you take a photograph of the subject, the object appears life-sized instead of miniaturized when the photo is printed. The term "macro" has been used in marketing materials to mean a camera is able to focus on a subject close enough so that when a 6×4 inch print is made, the image is life-size or larger.


Lenses designed for macro photography are usually at their sharpest at macro focus distances and are not quite as sharp at long focus distances. That means depth of field is an important consideration in macro photography. Good focus on the most important part of the subject is critical because anything outside the chosen depth of field will be blurry. A small aperture, or high f-number, is advisable to ensure sufficient depth of field and focus. This requires either a slow shutter speed or bright lighting for correct exposure, which brings me to lighting.


If you can't see some of the finer details, there is no way you'll capture it with your camera. Sufficient lighting is absolutely necessary if you want to see everything in the photograph. But, when getting in close, it can be difficult to allow for enough light between the camera and the subject. Some photographers use telephoto macro lenses or ring flashes which circle around the front of a camera lens. But as advertised in this blog, I am an armature! I have not these macro lenses, but maybe I'll get one of those ring flashes later.


I took these pictures today. The single pine branches and frost crystals in this picture aren't shown at a 1:1 magnification ratio, but more like a 1:4 or 1:5. The super-cold in Minnesota has been replaced by some warmth, which melted some of the snow and added moisture to the air. Then when the temperature dropped in the evening, frost began to form and then it slowly built into these long, spiky ice crystals. Shortly after I took these photos in the morning, the sun emerged from behind the clouds and melted them all.

Tuesday, December 29, 2009

Photography Assignment #3 ~ Portrait of a Pet

The idea of taking someone's portrait can be a bit intimidating for a beginner or amateur photographer. Luckily, there are ways to practice with live subjects, provided that you aren't allergic to the furry or feathered.
Ruffio & Watts

Now I know that it isn't entirely the same as taking human portraits because you can't really "pose" a cat or a dog to help accentuate their best features. For example, pets won't cooperate if you ask them to tilt their chin at a 90-degree angle while turning their head slightly to the right to hide that double-chin. Having a moving, living, breathing subject is very different than still-life. They don't always cooperate. Sometimes they break out into wrestling.

Wrastlin' Kats

But the practice does accentuate your powers of observation with a live subject and the different dynamics that could include. How the subject interacts with its environment and how environment affects the visual mood. How a light source from the left casts a shadow on the right, adding depth and contrast. How just even slight changes in expression can entirely change the feel of the picture. Those are just a few examples, of course, but you get what I mean.

Two Kitty Paws


The best part? If session doesn't go well or if the practice portaits don't turn out, the "client" won't care. And, if your subject is your own pet, you can practice, practice, practice until you start liking the photos that you see!

Thursday, October 15, 2009

Photography Assignment #2 ~ Study of a Classic Car

Another assignment I fulfilled during my first set of photography classes was a study of a classic vehicle. The only requirements at the time were that the car be a model older than 1980, and that I take a picture of the headlight/fender, tailight/fender, and a wheel. Fine with me, classic cars are some of my favorite photography subjects.

1972 Ford Mustang Grande
Front Fender ~ Black & White
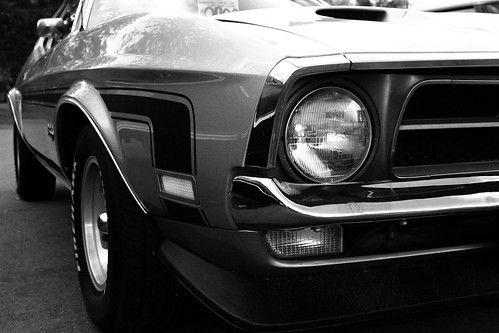
The other thing, of course, is that the film was black and white, which I firmly believe makes for more interesting pictures. The first time I did this assignment, my topic was a 1968 Ford Mustang. You have no idea how upset about not having those pictures I am. So for my second time around, I chose another Mustang.

Mustang Grande Tail ~ Black & White
This is a 1972 Ford Mustang Grande. It looks a little different than the '68, but it's still pretty. And since the car was originally gray, the black and white isn't hiding a beautiful paint job.

Mustang Symbol
The wheel picture didn't look that great, so I'm including this circular Mustang logo instead. Creative substitution is okay when you're making up your own assignments!

To see the color versions of these photos and the rest of the pictures in this set, please take a look at this 1972 Ford Mustang Grande photo set on Flickr.

Sara Duane-Gladden is a freelance writer and photographer in the Twin Cities area of the great state of Minnesota. 

Wednesday, September 30, 2009

Photography Assignment #1 ~ Simple Depth of Field

One of the things I intend to do in this blog is to recreate some of the photography assignments I had during the classes I took. The first I've tackled is, as the name implies, a simple depth of field task. I've already been playing around with the quick-snap Auto-Focus features, but this is one of my first forays into going 100% manual with this new camera.


The original assignment was to take at least 5 objects, put them in a line spaced evenly, and then take 2 pictures - one photo focusing on the first object and the other photo focused on the last. The first time I did this project, I did it with a stupid subject like jars of paint. This time I planned out my shots better, hence the chess pieces on the chessboard, neutral backdrop, and focused lighting.


Additionally, the first time around on this assignment, all of the film I used was black and white. It wouldn't really be a good recreation if I didn't have that in mind and include that in my compositions.


I also tried the reverse, with the "black" pieces instead of the "white" ones. It really changed the look and feel of the picture drastically. Especially in the black and white versions.


I predicted I'd like the photos of the darker pieces better, because I tend to gravitate towards darker colors (like the blacks, greens, and blues of my blog designs didn't give that away). But I really liked the white pieces better, in both color and black and white. I liked how the shadows stood out more and how much greater the colors contrasted, even though it seemed when I was putting the scene together that the neutrals were too washed out.

This was fun, and I have more chess pictures to follow soon. I played a game against myself and took some pictures, playing with depth of field and lighting. But that is for the next installment of Experiments.