Showing posts with label Lessons. Show all posts

Saturday, April 23, 2011

Lesson #5 ~ Underexposed, Overexposed - Mistakes Happen!

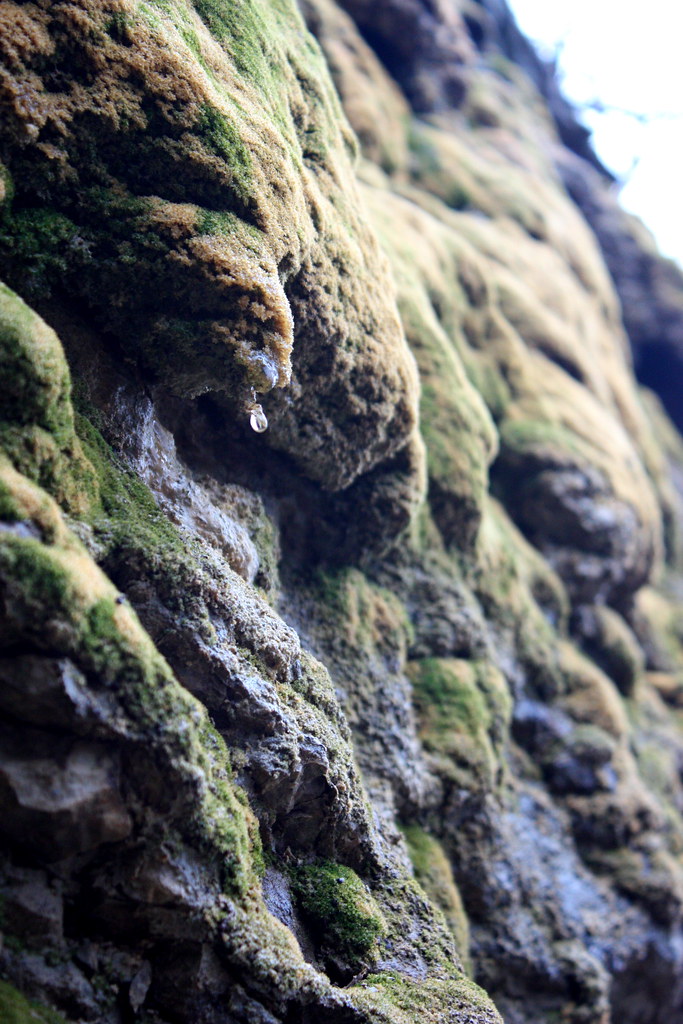
Mossy walls like this are fun to photograph because of the "landscapes" and textures they provide. I liked this spot below because of the water drip, but couldn't get the autofocus on my camera to capture just what I wanted.

Mossy Wall

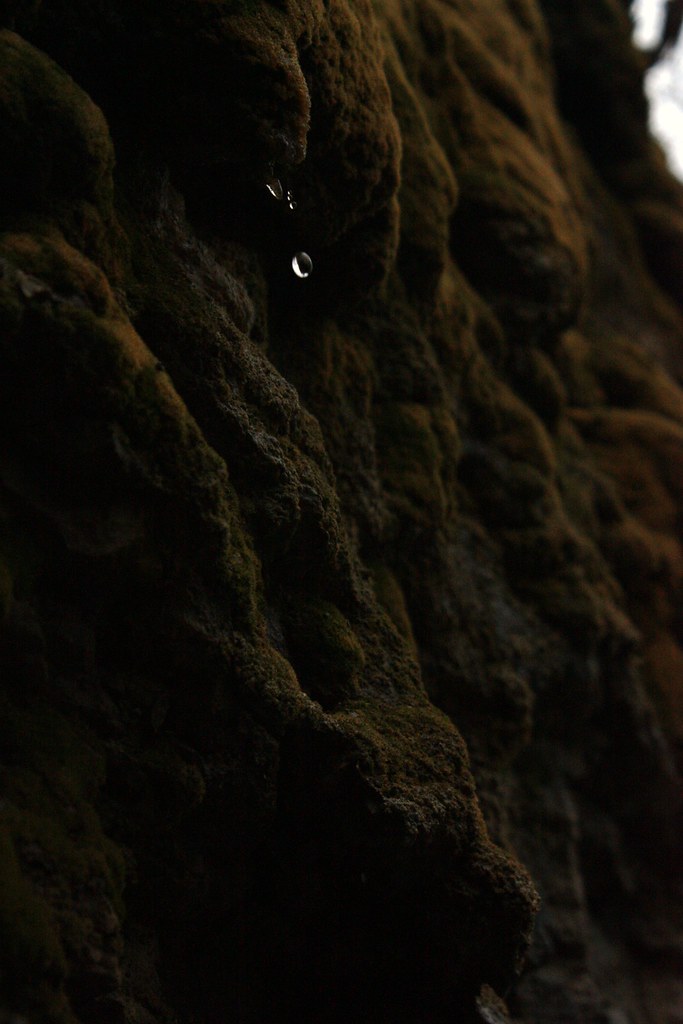
Unfortunately, I sometimes forget to double-check the aperture and exposure time when I switch from auto to manual. This was one of those times! Ugh, some of the resulting photos were almost black. Big mistake. But after playing around with brightness, contrast and saturation settings, the result was actually pretty cool in appearance.

Mossy Wall ~ Underexposed

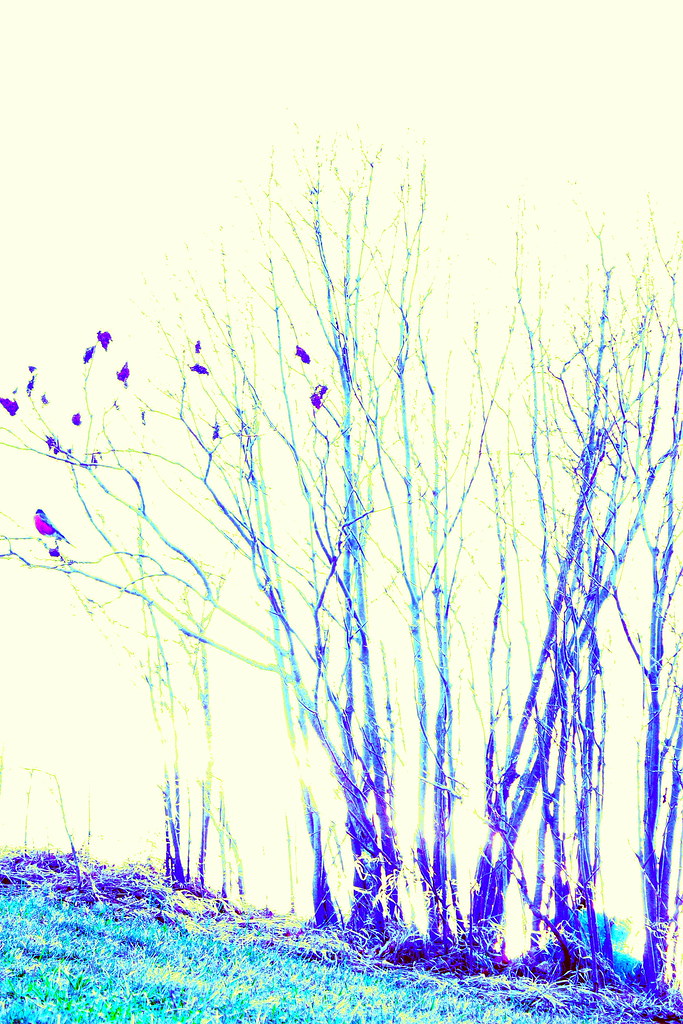
Something similar happened during my 365 project recently. I forgot entirely I had the camera set to manual and started snapping away without bothering to look at the viewfinder previews. Voila! Severely overexposed photos that ended up looking almost pure white. Again, I played with the settings, this time with an even more surreal result.

Robin Red Breast ~ 101/365 ~ 2011

The appearances of these last two photos is unique. It was fun to play with these mistakes. Had I been taking photos for anyone but myself, though, this would have been a problem. I must remember to pay closer attention when I change shooting modes.

Kinda strange that I hadn't done this sort of thing before, I guess that means previously I've been paying better attention when I switch between manual and auto, while these two times I didn't. The bird photo happened at the end of a long, exhausting walk and the moss photo troubles occurred because I was trying to maintain balance on a rocky slope - not exactly wandering around a formal affair snapping smiling faces. Still, now I know.

And knowing is half the battle.

Friday, December 10, 2010

Lesson #4 ~ To Flash or Not to Flash?

More Las Vegas vacation photos have been uploaded, and it gave me the chance to observe something and report what I've learned to other beginner, amateur, or self-taught photographers out there. To flash, or not to flash?

Monte Carlo Goddess (with Flash)

Flash is an invaluable tool that brightens a dark space. At night, flash can make all the difference between seeing your intended focal point and a dark frame full of unrecognizable features. Like any other light would, a flash can help illuminate what's in front of the camera.

Monte Carlo Goddess

Flash can also obscure what's in front of the camera. Notice that you can see a lot more of the details of this goddess outside the Monte Carlo Hotel in Las Vegas, Nevada. That's because basic flashes are mounted on the camera and pointed straight at the subject, reducing the occurrence of shadows that would normally add depth and detail. Additionally, the intense brightness of the light washes out the whiteness of the marble on this statue.

Photography is one of the few practices where less light can actually reveal more.

Las Vegas Vacation Photo Album
Las Vegas Vacation, Part I
Las Vegas Vacation, Part II

Saturday, January 23, 2010

Lesson #3 ~ Know Your Memory Card

Digital camera memory is an essential piece of digital photography equipment, but it is often overlooked. I know I almost overlooked it - I was not particularly happy my camera didn't come with even a basic one. There are many types of memory and it's a good idea to consider what type of memory a camera uses when you buy one.

It's also important to make sure you have enough memory before you take pictures of on vacation or at an important event. Though memory cards are reusable, their capacity is limited. Have a larger memory card, or extra cards, to make sure you have enough space to take the pictures you need. And always check your camera before you leave to make sure you downloaded everything. I have left the house thinking I had plenty of memory only to determine I was running at about half capacity because I’d taken pictures at an event and hadn’t downloaded them.

The good thing is most digital cameras allow you to adjust the image quality, which can change how many pictures fit one a memory card. You can have a couple-hundred high quality photos on one card and sometimes thousands of low-quality pics on the same card, should you be happy snappy low grade pictures. Also, depending on what kind of light you're in and more factors I can't even imagine, individual photos will have different sizes, so sometimes you can squeak in a few more and sometimes, you end up with less.

Between camera manufacturers, memory card capacity does vary, so make sure to take this into consideration if you're buying a new digital camera. With my Canon XSi, I have two 4-gigabyte cards and they can hold about 350 high quality JPGs or about 110 RAW image files on each of them. I have a capacity for taking about 700 or 220 photos, depending on what file type or image quality I use.

I haven't tried taking pictures with RAW files yet. I wanted to this weekend so I could include one in this lesson, but it's raining in the middle of January in Minnesota, so that was out of the question. But I will be trying it out soon! In the meantime, I think this photo would have been a good one to try in RAW. You can't quite see the ripples in the clouds as well as I saw them when I was taking the photo.

Rippled Clouds

Saturday, September 26, 2009

Lesson #2 ~ Know Your Battery

Don't learn this lesson the hard way. I almost did and it was almost a tragedy. Almost.

I was not paying attention to when the last time my battery was charged. Most of the week, I was messing around with the camera and having fun. Totally wasn't thinking about the battery.

On Thursday, though, I brought it to a local event to get pictures to go with an article I'm writing. Partway through, the battery indicator started flashing and the camera started powering down unexpectedly. I got all the pictures that I wanted, but it could have been missed opportunity. So

1. Know how long your battery lasts
2. Use it until its almost drained, then charge it
3. Unless you need it for something important, in which case make sure you charge your battery before you go.

I can't post any pics of the event until they're published with the article I'm writing. So instead, I'll post my favorite picture I took this week:
Moss & Cobwebs

Thursday, September 17, 2009

Lesson #1 ~ Know Your Camera

The Basic Lesson
When I decided to buy a new camera, I did my research. I first determined three things:

1. What my expectations were for future photography interest
2. What types of pictures I would like to take
3. What my spending limit would be

Naturally, all of them are interrelated and can have an effect on each other: My previous experience with photography classes and a year-and-a-half of playing around with a point and shoot means I expect I will remain interested in cameras well into the future. I determined I wanted to be able to do all the snazzy digital effects and presets, but I also wanted to be able to take manual shots. And since both of those add up to me needing a semi-professional camera, I knew I would be spending between $500 and $1000, depending on the brand, model, and features.

After that, I did a lot of research, mostly at Flickr and talking to other people I know who are interested in photography. I determined that the Canon Rebel XSi was a good fit for me because it had the options I wanted and just enough bells and whistles to keep me learning for a long-time to come, but that didn't have a lot of features I'm not going to use (like HD video for example). And because its not the most recent Canon like this released to the public, it was ripe for sales.

The day I went to go buy the camera, it was on-sale everywhere at a low price the clerks hadn't seen before (and was well in-line with prices I'd seen online). At the three places I went, it was listed at the same price of $700. But the National Camera Exchange was offering $160 in free photography classes on top of the sale price, so they won my business.

Here is where the lesson I wasn't expecting comes in:

After unpacking what had looked like an unopened box and the battery was charged, I finally had time to play with the new camera, so I started taking some practice shots. About 10 shots in, I noticed the numbers of the photos were 0470, 0471, 0472, etc. I looked in the manual, and it said that the very first picture I took should have been 0001. Then I thought about how the battery only took an hour to charge when the clerk said it should take 4 hours. I called the store and suggested to them that I had been sold a used camera and described what I'd found. They apologized for the error and said I could bring it in and get a new one and I could be the first person to turn it on when I got to the store.

Sure enough, the clinching clue came at the store when I turned on the new camera: It asked me to set the date and time. The first camera I'd bought already had the date and time set. What's the moral of this story?

Know Your Camera. Research it, read about it, get to know it before you get it, then read more after your purchase. If you're getting an SLR camera, you're spending a pretty penny for a high-quality piece of equipment. If you want to buy a used or refurbished piece, that's one thing (and you should ask the clerk about any information they can give you about its previous use). If you want it to be new, insist on it. In this case, there was no way of knowing what the previous "owner" had done with it because it had been passed off as new and unused (I suspect it was brought on a vacation and then returned to the store). I wasn't willing to make such a monetary investment in something of which I was unsure.

In the meantime...
The first picture I took with the new camera was on accident, but this second one was very cute and intentional. My dog Spirit looks on at a friend's rottweiler puppy, Brutus.

The third picture I took tickles me because it demonstrates what I couldn't do with the point and shoot: Determine what I wanted in-focus or out of focus.
See the rest of the first new camera photoset at Flickr.